Are you ready to give your wood floors a flawless finish? Using the right nail gun can make all the difference.
Imagine speeding up your project while making sure every plank stays perfectly in place. Whether you’re a DIY enthusiast or a professional, choosing the best nail gun for wood floors will save you time, effort, and frustration. Keep reading to discover how the right tool can transform your flooring job from tricky to trouble-free.
Your perfect wood floor is just a few nails away!
Choosing The Right Nail Gun
Choosing the right nail gun for wood floors is important for a smooth installation. The right tool helps you work faster and with better results. Not all nail guns suit every job. Understanding your options makes the process easier. This guide breaks down key points to consider.
Types Of Nail Guns For Wood Floors
Flooring nail guns come in different types. The most common are pneumatic, electric, and manual. Pneumatic guns use air pressure for strong, fast nailing. Electric models run on batteries or cords and offer more convenience. Manual nailers need physical effort but cost less. Each type fits different skill levels and budgets.
Key Features To Consider
Look for features that improve comfort and accuracy. Depth adjustment lets you control how deep nails go. A lightweight design reduces hand fatigue during long jobs. Check the magazine size for how many nails it holds. Also, safety features protect against accidents. These details impact your work quality and ease.
Corded Vs. Cordless Models
Corded nail guns provide constant power. They suit heavy or long projects without battery worries. Cordless models offer freedom to move around easily. Batteries last longer now, but you should keep spares ready. Think about your workspace and power access before choosing. Both types have pros and cons for different needs.

Credit: freemantools.com
Essential Tools And Materials
Installing wood floors with a nail gun needs the right tools and materials. This helps the job go smooth and the floor last long.
Choosing the correct nails, wearing safety gear, and having extra supplies are key parts of the process.
Selecting Nails And Staples
Pick nails or staples made for wood flooring. They should be strong and fit your nail gun. Length matters—too long can split wood, too short won’t hold well. Use nails with the right gauge for your floor type. Some floors need cleats for better grip. Check the nail gun manual for the best options.
Safety Gear Recommendations
Wear safety glasses to protect your eyes from flying debris. Use ear plugs to guard against loud noise. Gloves help keep your hands safe and steady. Knee pads protect your knees while working on the floor. Wear a dust mask to avoid breathing in wood dust. Safety first keeps work safe and comfortable.
Additional Installation Supplies
Keep a hammer and pry bar handy for adjustments. Use a measuring tape to ensure precise cuts. A chalk line helps mark straight rows. Wood glue can strengthen joints if needed. Have a vacuum nearby to clean dust and nails. These supplies make the job cleaner and easier.
Preparing The Workspace
Preparing the workspace is the first step to install wood floors with a nail gun. A clean and ready area helps the job go smoothly. It also prevents damage to the wood and tools. Take time to prepare well. This saves effort later.
Focus on three key parts: acclimating the wood, inspecting the subfloor, and clearing the area. Each step is important for a strong, lasting floor.
Acclimating Wood Flooring
Wood needs time to adjust to room temperature and humidity. Leave the wood planks in the workspace for several days. This helps the wood expand or shrink naturally. It reduces gaps and warping after installation. Place the wood flat and stack it evenly. Keep the area dry and well-ventilated.
Subfloor Inspection And Repair
Check the subfloor for damage or uneven spots. Look for cracks, loose boards, or moisture issues. Repair any problems before starting. A solid subfloor supports the wood better. Use a level to find dips or bumps. Replace weak areas with new material. Dry the subfloor completely to avoid mold or wood rot.
Clearing And Leveling The Area
Remove furniture, rugs, and debris from the room. Sweep or vacuum the floor to remove dust and dirt. Clear space helps you move freely and work faster. Level the floor if needed. Use a leveling compound on low spots. Let it dry fully before laying the wood. A flat surface ensures the nail gun works well and the floor stays even.

Credit: easiklip.com
Step-by-step Installation Process
The installation process of wood floors with a nail gun is simple and efficient. It saves time and gives a strong hold to the floorboards. Follow these steps to get the best results.
Setting Up The Nail Gun
Start by reading the nail gun manual carefully. Check the air pressure if using a pneumatic nailer. Adjust it according to the wood floor requirements. Load the right nails that fit your gun and flooring type. Test the gun on a scrap piece of wood. Make sure it drives nails smoothly without damage.
Proper Nailing Techniques
Hold the nail gun firmly and at the correct angle. Aim at the tongue of the wood plank to avoid splitting. Press the trigger gently to drive the nail in. Avoid hitting too hard or too soft. Each nail should be flush with the wood surface but not over-driven.
Maintaining Consistent Spacing
Keep nails spaced evenly to secure the floor properly. Measure the distance between nails before starting. Typically, nails go about 6 to 8 inches apart. Consistent spacing prevents gaps and ensures a tight floor fit. Check spacing regularly as you move along the floor.
Common Mistakes To Avoid
Using a nail gun for wood floors can speed up the job. Yet, many make simple mistakes that cause problems. Avoid these errors to get the best results and protect your floors.
Overdriving Or Underdriving Nails
Driving nails too deep can damage the wood surface. The nail head may leave dents or holes. Nails not driven deep enough can loosen over time. This causes squeaky floors and weak boards. Adjust the nail gun for the right depth. Test on a scrap piece before starting.
Ignoring Safety Protocols
Nail guns are powerful tools that need respect. Not wearing safety glasses risks eye injury. Keep hands clear of the nail path. Always check that the tool is off before loading nails. Follow all safety instructions in the manual. Safe use prevents accidents and keeps you working.
Skipping Subfloor Preparation
A clean, dry subfloor is key for strong floors. Dirt, nails, or debris can stop nails from holding well. Uneven surfaces cause gaps and loose boards. Remove old nails and sweep the area. Inspect the subfloor for damage before nailing. Proper prep makes floors last longer and look better.
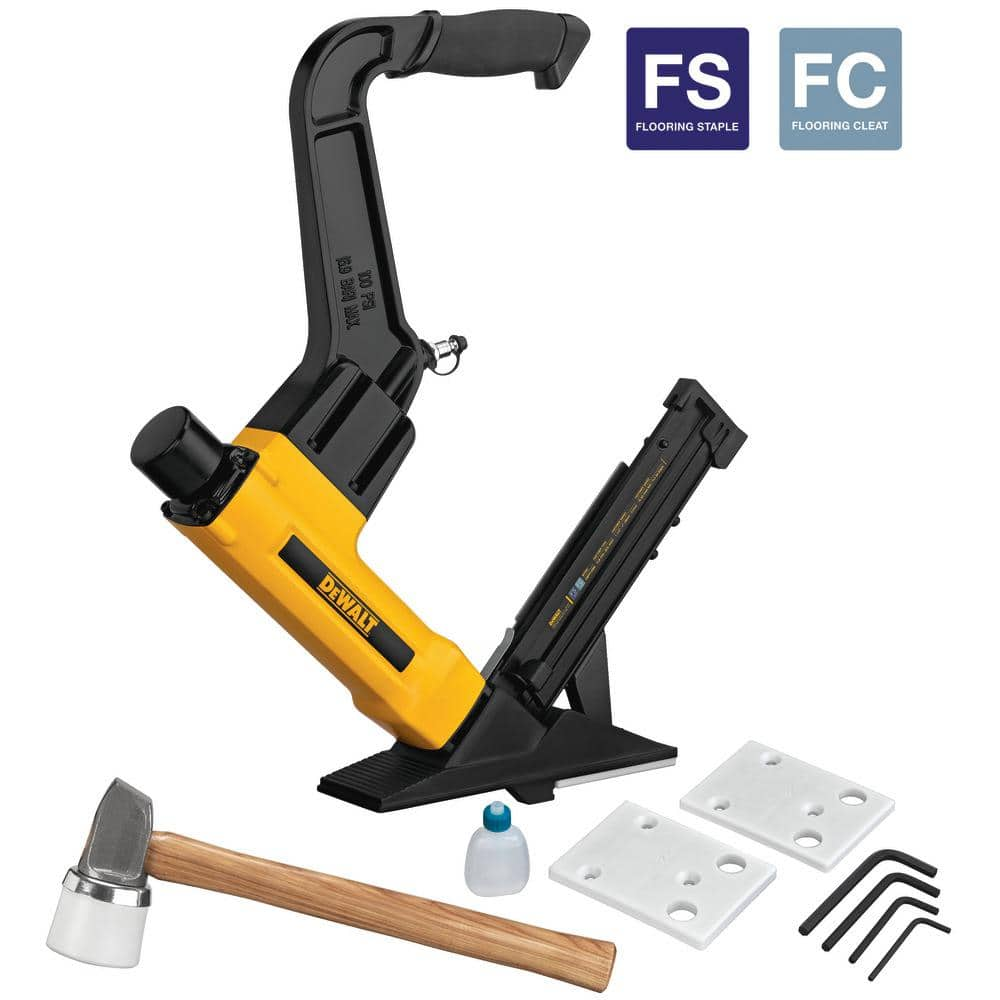
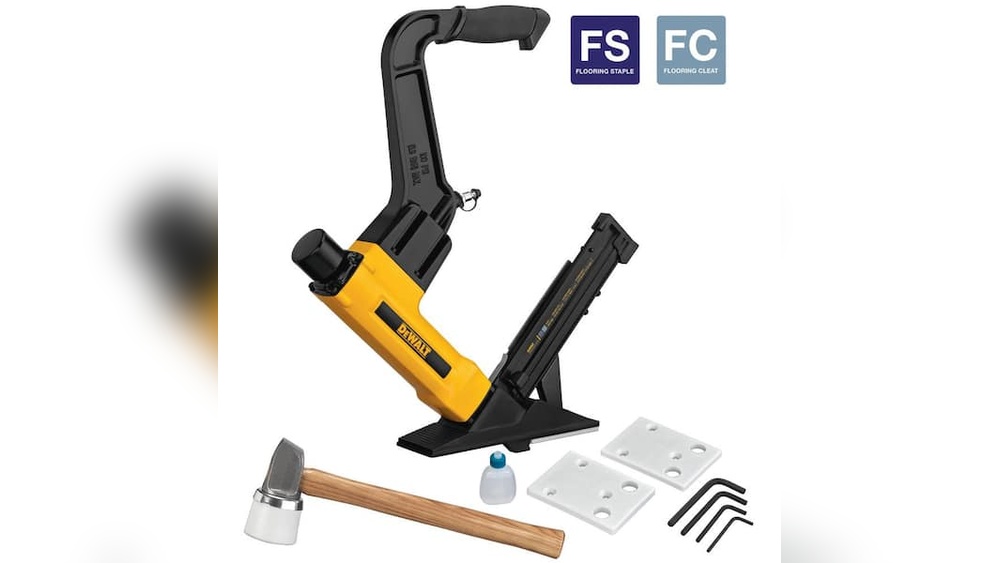
Credit: www.homedepot.com
Maintenance And Troubleshooting
Maintaining your nail gun ensures it works well and lasts longer. Troubleshooting helps fix common problems fast. Both are key to smooth wood floor installation.
Cleaning And Storing Your Nail Gun
Clean your nail gun after every use. Remove dust, wood chips, and nail debris. Use a dry cloth or compressed air for this task. Avoid water or harsh chemicals that can damage parts.
Store the nail gun in a dry, cool place. Keep it in its case or a toolbox. This protects it from moisture and accidental damage. Proper storage also helps keep the tool ready for the next job.
Fixing Jammed Nails
Jammed nails block the nail gun and stop work. Turn off and unplug the tool before fixing jams. Open the nail magazine carefully to remove stuck nails. Use pliers if nails are hard to reach.
Check for bent or damaged nails causing jams. Replace them with the correct size and type. Test the gun after clearing jams to ensure smooth firing.
Handling Equipment Wear And Tear
Regular use causes parts to wear down over time. Check the nail gun’s driver blade and springs often. Replace worn parts to keep the tool safe and efficient.
Lubricate moving parts with the recommended oil. This reduces friction and prevents rust. Follow the manufacturer’s guide for maintenance schedules and part replacements.
Frequently Asked Questions
What Type Of Nail Gun Is Best For Wood Floors?
A pneumatic flooring nailer is ideal for wood floors. It offers strong, consistent fastening and minimizes wood damage. Choose one compatible with your wood type and flooring thickness for best results.
Can A Nail Gun Damage Hardwood Floors?
Yes, improper use or wrong nail gun size can dent or split hardwood floors. Always use a flooring-specific nailer and follow manufacturer guidelines to avoid damage.
How To Choose Nails For Wood Floor Nail Guns?
Select nails designed for flooring nailers, typically cleated or clipped head nails. Ensure the length matches your floor thickness to secure planks without splitting.
Is A Cordless Nail Gun Suitable For Wood Floors?
Cordless nail guns offer portability and ease of use but may lack the power of pneumatic models. They are suitable for small projects or tight spaces.
Conclusion
Choosing the right nail gun makes wood floor installation easier and faster. It helps hold boards tightly and ensures a strong fit. Using the proper tool reduces mistakes and saves time. This leads to a smoother, more beautiful floor. Remember to pick a nail gun that suits your project needs.
With the right tool, your wood floors will last longer and look great. Simple steps, solid results.