Nail Gun for Hardwood
Installing hardwood flooring is one of the most rewarding home improvement projects you can undertake. It enhances property value, improves interior aesthetics, and creates a durable surface that can last for decades. However, achieving professional results depends heavily on using the right tools—especially the correct nail gun for hardwood floors.
When properly selected and adjusted, this tool ensures tight fastening, perfect board alignment, and long-term floor stability. In this comprehensive guide, you’ll learn how to choose the right equipment, select compatible fasteners, prepare your subfloor correctly, and complete a smooth, squeak-free installation.
Whether you’re a homeowner working room-by-room or a contractor handling large installations, this guide will help you avoid common mistakes and deliver a flawless finish.
Guide to Installing Wood Flooring Using the Right Equipment
Why Tool Selection Determines Flooring Quality
The tool you choose directly impacts installation accuracy, structural integrity, and long-term durability.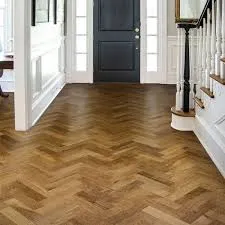
Importance of Precision Fastening
Hardwood expands and contracts with changes in temperature and humidity. Consistent fastening pressure is essential to prevent lifting or shifting. Proper fastening:
Prevents uneven board height
Ensures tight tongue-and-groove locking
Improves long-term stability
When boards are secured correctly, the entire floor performs as a single solid surface.
Preventing Board Movement, Squeaks, and Gaps
Improper fastening leads to squeaks, visible separation, and premature wear. A flooring nailer drives fasteners at the correct angle—typically 45 degrees through the tongue—maintaining strong board alignment and reducing movement.
Manual Nailing vs Powered Fastening Tools
Manual nailing is slow and inconsistent. Powered tools—whether pneumatic or battery-based—offer:
Controlled depth settings
Faster installation
More uniform results
For medium to large flooring projects, powered fastening systems are the clear winner.
Overview of Modern Fastening Technology
Pneumatic vs Cordless Options
Pneumatic nailers use compressed air to drive cleats or staples deep into hardwood planks. They are powerful and reliable for extended installations.
A cordless nail gun, on the other hand, offers excellent portability and eliminates hoses.
Battery Operated Nail Gun Advantages
A battery operated nail gun provides:
Hose-free mobility
Easier setup
Better maneuverability in tight rooms
It’s ideal for small to mid-sized residential installations.
When Manual Floor Nailers Are Still Used
Some professionals prefer manual floor nailers for traditional ¾-inch solid hardwood. While durable and effective, they require more physical effort.
Types of Nail Guns Suitable for Hardwood Flooring
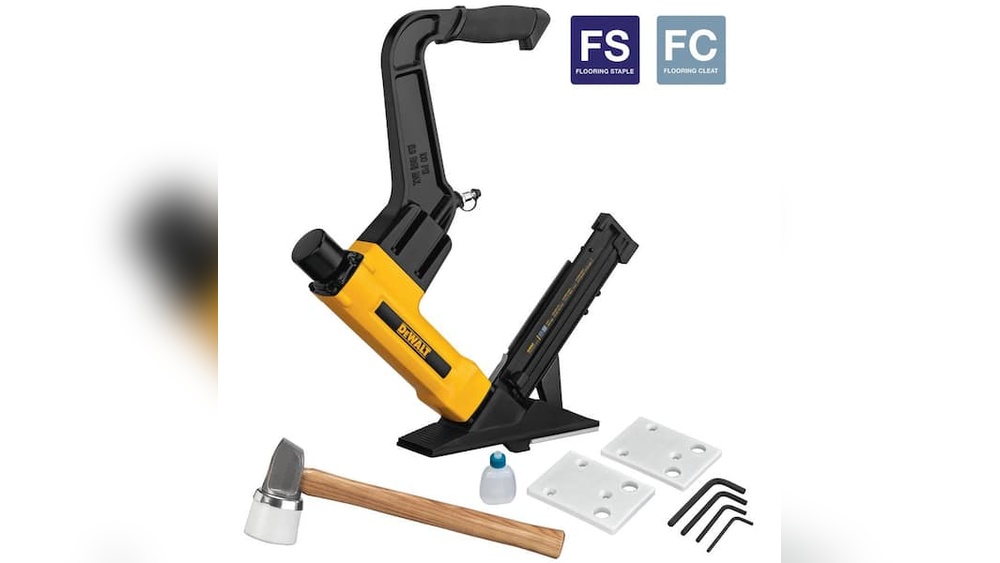
Pneumatic Flooring Nailers
Pneumatic systems remain the industry standard.
How Compressed Air Systems Work
A compressor generates air pressure, which drives hardwood cleats or flooring staples at a precise angle through the plank tongue and into the subfloor.
Pros and Limitations
Pros
High driving power
Consistent penetration depth
Ideal for thick hardwood
Cons
Requires air compressor
Less portable
Ideal for Large Hardwood Projects
If you are installing hardwood throughout multiple rooms, pneumatic systems increase efficiency and reduce fatigue.
Cordless Nail Gun vs Battery Operated Nail Gun
Although commonly used interchangeably, slight differences exist depending on power systems.
Portability Benefits
Cordless systems offer unmatched freedom:
No hoses
No compressor
Easy transport
Perfect for DIY homeowners.
Runtime and Power Comparison
Battery runtime depends on amp-hour rating. For dense hardwood species, pneumatic models still provide stronger and more consistent driving force.
Best Applications for Home Installers
Cordless systems are excellent for:
Small renovations
Single-room installations
Repair work
Why Roofing Nail Gun or Roof Nail Gun Are Not Suitable for Floors
A roofing nail gun is designed specifically for asphalt shingles—not hardwood flooring.
Fastener Type Differences
Roofing nailers use short, wide-head nails that are incompatible with tongue-and-groove systems.
Head Design Incompatibility
Flooring requires angled cleats or staples. Roofing tools fire nails straight down.
Surface Damage Risks
Using a roof nail gun can:
Crack hardwood planks
Leave visible head marks
Damage finished surfaces
Can You Use a Nail Gun for Fencing on Flooring?
A nail gun for fencing is built for outdoor structural applications.
Fastening Strength Comparison
Fencing nailers use large framing nails that can split hardwood.
Nail Angle Considerations
Flooring fasteners must enter at a 45-degree angle. Fencing tools do not provide this precision.
Why Specialized Flooring Tools Matter
Using the proper tool protects your investment and ensures long-term performance.
Choosing the Correct Nails for Flooring Installation
Types of Nail Gun Nails
Selecting the right fastener gauge is critical.
Cleats vs Staples
Hardwood cleats allow slight natural movement and reduce cracking.
Flooring staples provide a stronger grip but may increase splitting risk.
Gauge Sizes (15, 16, 18 Gauge)
15 gauge: Maximum holding power
16 gauge: Balanced strength and flexibility
18 gauge: Light-duty applications
Length Requirements
Fasteners should penetrate the subfloor at least ¾ inch for optimal stability.
Nails for Craftsman Nail Gun – Compatibility Guide
Brand Compatibility
Always confirm manufacturer specifications regarding:
Fastener gauge
Nail angle
Recommended length
Avoiding Jamming Issues
Using incompatible nails can cause:
Feeding problems
Uneven driving
Tool damage
Fastener Selection for Different Flooring Types
Solid Hardwood
Requires longer cleats due to thickness and density.
Engineered Wood Floors
Engineered wood floors may require shorter fasteners depending on subfloor thickness.
Engineered Wood Floor Panels
Some engineered wood floor systems are thinner and require specific staple gauges for optimal hold.
For professional guidelines, consult the National Wood Flooring Association:
https://www.nwfa.org/
Understanding Wood Flooring Types Before Installation
Solid Hardwood Options
Oak Wood Flooring
Oak remains one of the most popular choices due to its durability and attractive grain pattern.
Dark Wood Flooring Trends
Dark wood floors create a modern, dramatic aesthetic. However, they may show dust more easily.
Engineered Wood Floors vs Solid Wood
Moisture Resistance
Engineered construction provides better resistance to humidity changes.
Stability Factors
Layered core construction minimizes expansion and contraction.
Best Wood Flooring for Climate Conditions
In humid environments, engineered options are often considered the best wood flooring solution.
Flooring Wood Parquet Installation Considerations
Pattern Alignment
Herringbone and chevron designs require precise layout planning.
Expansion Gaps
Leave perimeter gaps to accommodate seasonal movement.
Subfloor Leveling
An uneven subfloor compromises fastening pressure and stability.
Alternatives: Wood Look Vinyl Flooring and Wood Tile Floor
When Nail Guns Are Not Required
Wood look vinyl flooring and wood tile floor systems often use floating or adhesive installation methods.
Click-Lock vs Adhesive Systems
Floating systems are easier for DIY installation, while adhesive methods provide added stability.
Step-by-Step Hardwood Installation Guide
Step 1 – Preparing the Subfloor
Conduct moisture testing
Clean debris thoroughly
Level uneven areas
Install vapor barrier if required
Step 2 – Acclimating Wood Planks
Store planks inside the room for 3–5 days to stabilize humidity levels.
Step 3 – Proper Tool Setup
Adjust air pressure
Set depth control
Test on scrap material
Step 4 – Laying the First Rows
Ensure the starter row is perfectly straight. Use face nailing if necessary.
Step 5 – Continue Installation Pattern
Stagger joints
Check alignment frequently
Avoid overdriving fasteners
Step 6 – Finish Edges and Transitions
Reinstall baseboards and inspect for loose boards or gaps.
Common Installation Mistakes to Avoid
Using Incorrect Fasteners
Wrong gauge or length reduces holding strength.
Improper Pressure Settings
Excessive pressure causes cracking.
Skipping Moisture Testing
Moisture issues lead to buckling and warping.
Safety Guidelines
Personal Protective Equipment
Safety glasses
Hearing protection
Knee pads
Proper Handling Techniques
Maintain trigger discipline and correct tool angle to prevent injury.
Post-Installation Care and Finishing
Applying Wood Floor Stain
Always test stain samples before full application.
Choosing Wood Flooring Colours
Light finishes brighten rooms; dark tones add elegance and depth.
Maintenance Tips
Sweep regularly
Avoid excessive moisture
Refinish every 7–10 years
FAQs About Hardwood Floor Installation
What type of nail gun is best for hardwood floors?
A pneumatic flooring nailer with adjustable depth control is ideal for thick hardwood planks.
Can I install engineered wood floors with a cordless model?
Yes, provided it supports the required fastener gauge and length.
What size nails should I use?
Most hardwood floors use 15 or 16 gauge cleats.
Is a roofing nail gun suitable?
No, roofing tools use incompatible fasteners.
How far apart should fasteners be placed?
Typically every 6–8 inches along the tongue.
Conclusion
Installing hardwood flooring requires careful planning, proper preparation, and the right equipment. Choosing a specialized nail gun for hardwood floors ensures precise fastening, reduces movement, and enhances long-term durability.
From selecting compatible fasteners to preparing the subfloor and applying finishing touches, every step contributes to a professional-grade result. With the guidance provided above, you are fully prepared to complete a flawless hardwood flooring installation that adds beauty, stability, and value to your home.
Visit Homepage