Are you looking to protect your beautiful wood floors and keep them looking new for years to come? Choosing the right floor sealer for wood floors can make all the difference.
The right sealer not only guards against scratches, spills, and wear but also brings out the natural beauty of your wood. You’ll discover how to pick the best floor sealer, simple application tips, and expert advice to make your floors shine like never before.
Ready to transform your wood floors and keep them stunning? Let’s dive in!

Types Of Floor Sealers
Choosing the right floor sealer is key to protecting wood floors. Different sealers offer various benefits. Some enhance the wood’s natural look. Others provide strong protection against wear and tear. Understanding types of floor sealers helps in making a smart choice.
Water-based Sealers
Water-based sealers dry quickly and have low odor. They keep the wood’s natural color bright. These sealers are easy to clean with soap and water. They create a clear finish that resists yellowing. Ideal for indoor use and areas with less traffic.
Oil-based Sealers
Oil-based sealers add a warm, rich tone to wood floors. They take longer to dry but offer strong protection. These sealers penetrate deeply into the wood. They make floors more resistant to scratches and stains. Perfect for high-traffic rooms and older wood floors.
Wax Sealers
Wax sealers give floors a soft, natural shine. They are easy to apply and repair. Wax protects wood from moisture and dirt. It needs frequent reapplication to maintain its look. Best for low-traffic areas or decorative wood pieces.
Polyurethane Sealers
Polyurethane sealers are tough and long-lasting. They form a hard shell on the wood surface. These sealers resist water, heat, and scratches. Available in both oil-based and water-based formulas. Suitable for busy homes and commercial spaces.
Benefits Of Sealing Wood Floors
Sealing wood floors offers many important benefits. It protects the wood and keeps it looking good. The right sealer creates a strong layer on the surface. This helps the floor last longer and stay beautiful. Below are key benefits of sealing wood floors.
Enhanced Durability
Sealing wood floors makes them stronger and more resistant to wear. The sealer forms a tough barrier against scratches and dents. It helps the floor handle heavy foot traffic without damage. This means the floor stays in good shape for years.
Moisture Resistance
Wood can absorb water, causing it to swell or warp. A good sealer blocks moisture from reaching the wood. This stops water damage and protects against spills or humidity. Moisture resistance keeps floors stable and safe from mold.
Improved Appearance
Sealers enhance the natural color and grain of wood. They add a smooth, shiny finish that looks fresh and clean. Sealed floors reflect light better, brightening the room. The finish also prevents dullness and fading over time.
Ease Of Maintenance
Sealed floors are easier to clean and care for. Dirt and dust do not stick to the sealed surface. Cleaning takes less effort and fewer harsh chemicals. This keeps the floor looking good with simple regular maintenance.
Choosing The Right Sealer
Choosing the right floor sealer is key to protecting wood floors. It helps keep floors looking new and extends their life. The best sealer matches the wood type, daily use, and your budget.
Consider how different sealers work with various wood floors. Think about how much foot traffic your floors get. Environmental effects and cost also matter. These points guide you to the right choice.
Considering Wood Type
Different woods need different sealers. Hardwoods like oak need strong sealers. Softer woods like pine need gentle ones. The sealer should protect without changing the wood’s color too much.
Some sealers work better on porous woods. Others suit dense woods. Check the wood grain and finish before picking a sealer. This helps keep wood natural and beautiful.
Evaluating Traffic Levels
High traffic areas need tough sealers. These sealers resist scratches and wear. Low traffic rooms can use lighter sealers. This saves money and keeps floors smooth.
Think about pets and children too. They add wear and tear. Choose a sealer that handles daily life well. This keeps floors safe and strong.
Environmental Impact
Some sealers release harmful chemicals. Look for low-VOC or water-based options. These are safer for home and planet. They also dry faster and smell less.
Eco-friendly sealers protect your health. They reduce indoor pollution. Choosing green sealers helps keep air fresh and clean.
Budget Considerations
Sealant prices vary widely. High-end sealers last longer but cost more. Basic sealers are cheaper but may need more coats. Balance cost with durability.
Think about long-term savings. A good sealer cuts repair costs later. Plan your budget to get the best value.
Preparation Before Sealing
Preparing wood floors before sealing is crucial for a smooth, long-lasting finish. Proper preparation helps the sealer stick better and protects the wood. It also brings out the natural beauty of the floor. Follow these simple steps to get your floor ready.
Cleaning The Floor
Start by removing all dirt and dust. Use a broom or vacuum cleaner to clear the surface. Next, mop the floor with a wood-safe cleaner. Avoid soaking the wood with water. Let the floor dry completely before moving on.
Sanding Techniques
Sanding smooths the floor and removes old finishes. Use fine-grit sandpaper for the best results. Sand in the direction of the wood grain. Clean the dust with a vacuum or tack cloth after sanding. This step ensures the sealer bonds well.
Repairing Damages
Check the floor for cracks, holes, or scratches. Fill small gaps with wood filler. Use a putty knife to apply the filler evenly. Let it dry and sand the area smooth. Repairing damages prevents future problems and improves the floor’s look.
Application Process
Applying floor sealer on wood floors is a simple way to protect and enhance their look. The process needs care and the right steps to get a smooth finish. This section explains how to apply the sealer correctly.
Tools And Materials Needed
- Floor sealer suitable for wood
- Paint roller or brush
- Paint tray
- Sandpaper (fine grit)
- Vacuum or broom
- Clean cloths
- Protective gloves
- Mask (optional for fumes)
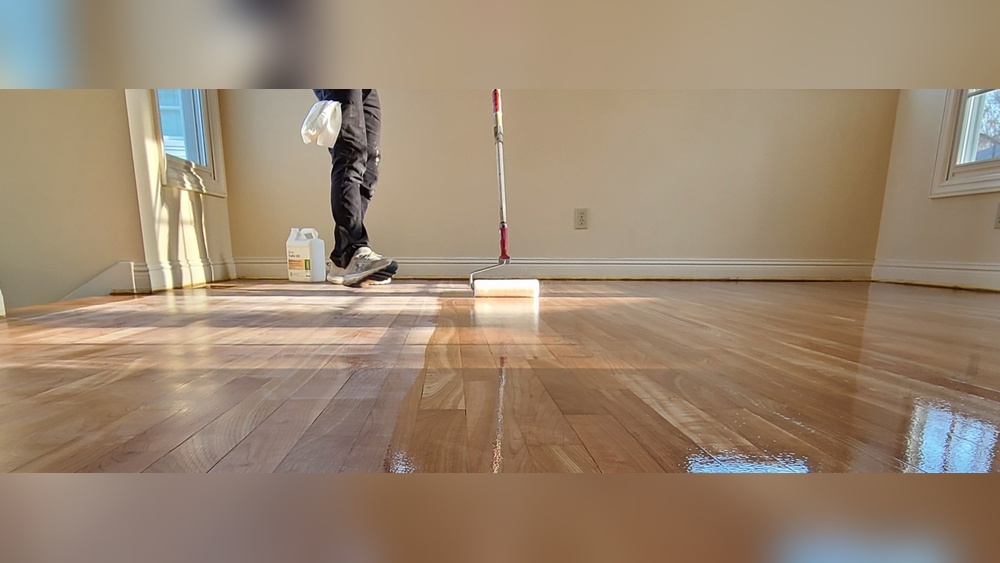
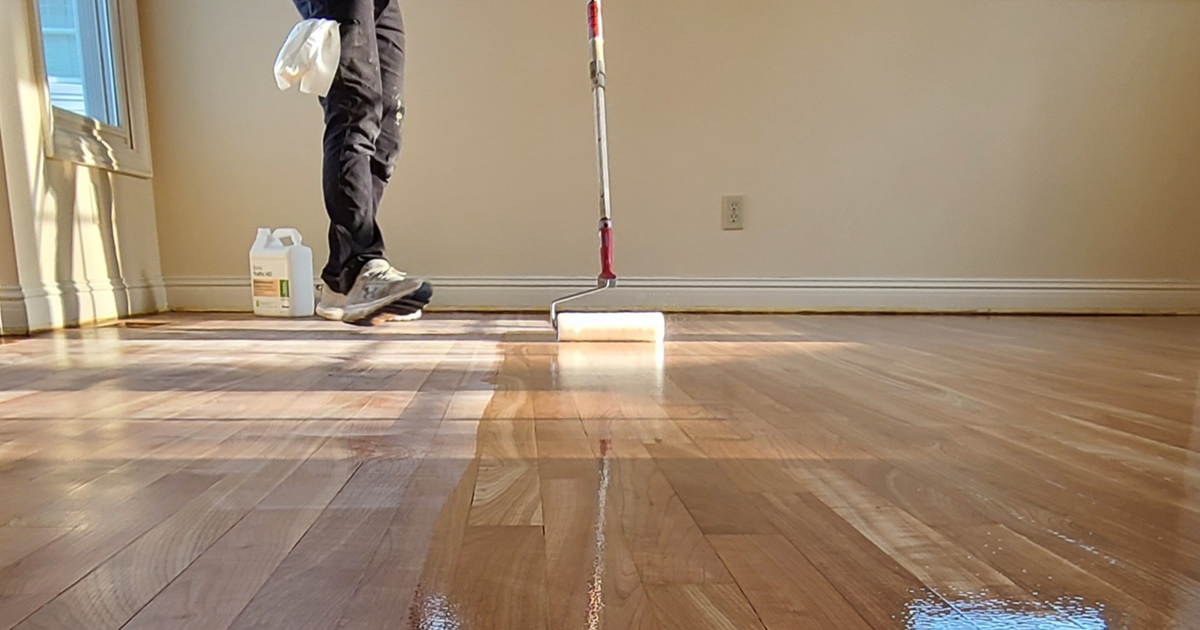
Step-by-step Application
First, clean the floor well. Remove dust and dirt using a vacuum or broom. Sand the wood lightly to smooth the surface. Wipe away dust with a clean cloth.
Pour the sealer into a paint tray. Use a roller or brush to apply a thin, even coat. Work in small sections to keep control. Follow the wood grain for best results.
Apply the sealer evenly. Avoid puddles or thick spots. Let the first coat dry before adding another. Usually, two coats give good protection.
Drying And Curing Times
Allow the sealer to dry for at least 2 to 4 hours. Check the product label for exact times. Avoid walking on the floor during this time.
Full curing can take up to 24 to 48 hours. Keep the room well-ventilated to help drying. Do not place furniture on the floor until fully cured.
Tips For Even Coverage
- Use a high-quality roller or brush.
- Apply thin coats rather than thick ones.
- Work in the direction of the wood grain.
- Keep a wet edge to avoid marks.
- Check for missed spots under good light.
- Allow proper drying time between coats.

Before floor sealer for wood floors, if you want to take much knowledge about wood floor that’s will be much more effective.
Maintaining Sealed Floors
Maintaining sealed wood floors keeps them looking fresh and protects their surface. Proper care extends the life of the sealer and prevents damage. Simple habits help preserve the wood’s natural beauty for years.
Regular Cleaning Practices
Clean sealed floors often to avoid dirt buildup. Use a soft broom or vacuum without a beater bar. Mop with a damp cloth, not soaking wet. Choose cleaners made for sealed wood floors. Avoid harsh chemicals that can wear down the sealer.
Avoiding Damage
Protect floors from scratches by using felt pads under furniture. Wipe spills quickly to prevent stains or water damage. Avoid walking on floors with high heels or shoes with sharp edges. Keep pet nails trimmed to reduce scratches. Place rugs in heavy traffic areas for added protection.
When To Reapply Sealer
Check the floor’s shine regularly. Dullness means the sealer is wearing off. Test by sprinkling water; if it soaks in resealing is needed. Most floors require resealing every few years. Follow the product instructions for best results. Proper timing keeps floors sealed and protected.
Common Mistakes To Avoid
Sealing wood floors protects them and keeps them looking better longer. Many people make simple mistakes that reduce the quality of their floor sealing. Avoiding these errors helps your floor stand beautiful and strong for years.
Applying Too Thick Layers
Putting on too much sealer can cause problems. Thick layers take longer to dry. They may peel or bubble after drying. Embed thin, even coats instead. Let each coat dry well before Including another.
Skipping Preparation
Good preparation is key. Dust, dirt, and old finish must be removed. Sand the floor lightly for better sealer grip. Clean the surface thoroughly to Keep away from rough patches. Skipping prep causes uneven sealing and poor results.
Ignoring Manufacturer Instructions
Every sealer has specific rules. Read the instructions carefully before starting. Follow drying times and application tips exactly. Using the sealer wrong may ruin your floor or decrease protection.
Frequently Asked Questions
What Is The Best Floor Sealer For Wood Floors?
The best floor sealer for wood floors propose durability and enhances natural wood grain. Choose water-based or oil-based sealers for protection opposed to moisture and wear.
How Often Should I Reseal Wood Floors?
Reseal wood floors every 2 to 3 years, depending on foot traffic and wear. Regular resealing maintains shield and appearance.
Can Floor Sealers Prevent Wood Floor Scratches?
Yes, floor sealers create a protective layer that reduces scratches. They help stay wood floors looking new longer.
Is Floor Sealer Safe For All Wood Types?
Most floor sealers are safe for common wood types like oak and maple. Always test on a diminutive area before full application.
For additional maintenance tips, check our guide on How to Get Paint off Vinyl Floor to handle stubborn stains effectively
Conclusion
Sealing wood floors keeps them strong and looking fresh. It stops water and dirt from causing damage. Choose the right floor sealer for your wood type. Apply it carefully and let it dry well. Regular sealing helps your floors last numerous years.
Clean spills quickly to protect the finish. A good floor sealer saves time and money on repairs. Keep your wood floors beautiful with simple care steps. Little efforts make a large difference in floor health.